My account was recently broken into by someone from some far away country. For safety precautions, I have made a new blog! My new blog is located here! Please subscribe to the new blog. A lot of the content here will be moved over to the new blog as well.
Thanks!

Sunday, August 4, 2013
Monday, July 29, 2013

I've been crazy busy lately working on my future house. Exciting, I know! As a result, I haven't had as much time to dedicate to my blog. Instead, I have been instagramming my makeup looks just about every day. I wanted to link you to my instagram so you can follow me for more updates and looks!


FOTD: Berry Neutral Eyes

Hey everyone! I'm back with a FOTD that I'm pretty excited about. I very rarely mix eyeshadows today because I am always afraid of how they will come out. I was feeling rather adventurous and decided to try mixing some shadows to get the perfect berry colored eye. Here's what I ended up creating.

Products used:
Eyes:Anastasia Brow Kit + Brow Whiz PencilMaybelline Color Whisper in Pin Up Peach
ELF Liquid Liner
Urban Decay Primer Potion
For the lid: I mixed Urban Decay YDK and Inglot #22
Crease: Urban Decay Woodstock
Outer-v: Mix of Inglot #434 and Urban Decay Blackout
Mary Kay Lash Love Mascara
Face:
Mac Pro Long Wear Foundation
Too Faced Chocolate Soleil
Tarte Blush in Exposed
Mac Blotting Powder
Lips:
Maybelline Color Whisper in Pin Up Peach
I think this look is really wearable, but fun. I've really been into more wearable looks lately, but I really want to keep things fun and not super-duper boring neutrals all the time. I hope I struck the right balance. Let me know what you think down below :)
Wednesday, July 24, 2013
Ariel Collection Review/Swatches

As a little girl, I often watched The Little Mermaid. I loved her quirky personality and her voice. The colors really stood out to me, even as a little girl. I loved the aquas, teals, and turquoises. I'd brush my mermaid doll and wish I was so free and able to roam the ocean searching for treasures. So, naturally when I saw this palette was coming out from Sephora, I was very very giddy. It made the perfect graduation gift!
The first photo above shows what the palette looks like on the front. It shows Ariel's outline and some of her objects she collects. It has a really lovely shine that makes this palette great for sitting out on my vanity.

The actually eyeshadows pull out and have a popable tray so you can remove it to keep the ariel packaging. I have to thank Sephora for this lovely development in packaging. I will definitely keep the packaging from this palette for a jewelry box or something of the sort.
The palette comes with 20 eyeshadows in a variety of shades and finishes. I appreciate the fact that some shadows are light colored and others are darker. I like the fact that there are also mattes in here. Some of the shadows are more of a sheen, while others have a little more glitter to them.
Gripes: The Sha La La color doesn't really match Ariel's hair at all. I would have loved a vibrant red in this palette. It seems to be missing. Even the "Sebastian" color is orange, which doesn't match him at all.
Swatches:
All of these swatches were taken in natural lighting without flash. The swatches are on bare skin without primer or a white base.
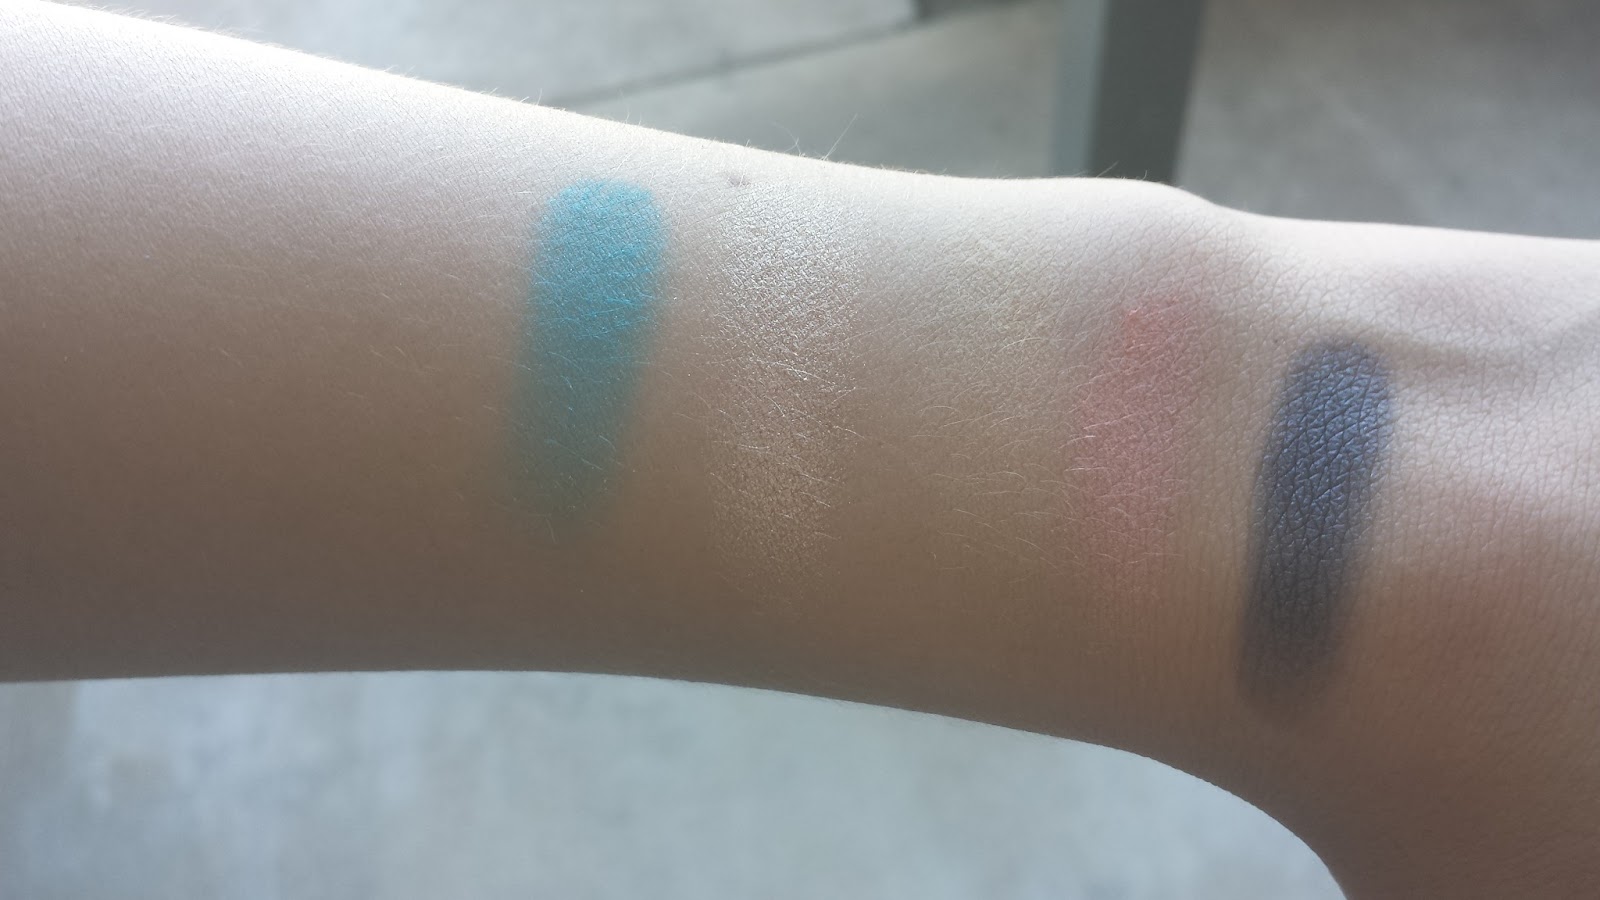
Row One:
From left to right:
Blue Lagoon, Scuttle, Flounder,Sebastian, Flotsam
Blue Lagoon, Scuttle, Flounder,Sebastian, Flotsam
The lighter colors are pretty hard to see on my fair skin. They may pop on someone with darker skin. It took a little more to build up the lighter colors.

Row Two:
Sea Shells, Les Poissons, Caspian Sea, Your Voice, Unfortunate Souls
I didn't have any problems with color pay off from this row. All of the shades went on smoothly.

Row Three:
Atlantica, Fins, Sick of Swimmin', Ursula, Sha La La
No problems with pigmentation in this row either.

Row Four:
Triton, Wanderin' Free, Jetsam, Sea Witch, Treasures Untold
I want to just say that I love the Sea Witch purple. It's so vibrant and pretty.
Palette Thoughts:
I have to say that I am a fan of this palette. The colors are fun and lively, perfect for summer! Most of the colors are very vibrant and pigmented. There are only a few duds (the lighter colors aren't as pigmented).
I haven't had a whole lot of fallout with this palette. There has been some, but nothing that can't be worked around.
I do find that the palette gets really messy from the colors. The shadows are very soft and tend to crumble a little when you put your brush into them. This creates a bit of a mess on the actual palette. If you hate messy palettes, you may want to stray from the Ariel palette.
I found that the shadows were pretty easy to work with. They seem to blend pretty well. Some of the vibrancy can be lost on some of the colors when you blend. I just pack more color onto it. Easy!
The palette retails for $55 and is currently sold out online. You will be able to purchase this palette in Sephora stores any day now. Make sure to call your Sephora to see if it is in stock.
Would I repurchase? If it wasn't LE, I would probably buy a second one if this ran out.


The Ariel Mirror!
It came in a cute little box that I promptly opened and discarded.

The packaging of this compact mirror is very sturdy. It has some weight to it, so if you are after a light weight mirror, I would not recommend this. The compact features Ariel and Eric in the Blue Lagoon. The packaging is blue and green, which I think suits the film very well.


I really love this mirror. It has already found a nice place in my purse and has been used constantly.
Let me know what your thoughts are on this collection!
Tuesday, July 23, 2013
FOTD: Why not Zoidberg?


Happy Tuesday readers! I've officially finished up my schooling, so I should hopefully be able to blog a little bit more. Today I tried out the Ren Clean Skincare Satin Perfection BB Cream that I received as a deluxe sample from Sephora with the purchase of my Ariel mirror. I will have a post about the Ariel collection soon, so stay tuned for that.
Ren BB Cream claims: "A silicone free BB cream that leaves the skin looking flawless, even toned and luminous with a perfect non-oily, satin finish. This true multi-function cream provides flawless coverage that banishes imperfections, gives SPF and anti-oxidant protection, while photo-rejuvenation technology reduces the appearance of underlying fine lines and wrinkles."
Quite a lot of claims for a BB cream, so I am naturally a little skeptical.
Finish: It does feel somewhat satin like. It's not completely matte, nor is it shiny.
How it feels on the skin: It feels very light weight and comfortable. No noticeable caking yet.
I did feel like this BB cream evened out my skin tone a little bit. This Ren BB cream is a fuller coverage than many others that I have seen, which makes me drawn to it. I do feel like the tone of it may be slightly pinker than my skin tone. It's subtle, but I think it's there. I'm not sure most people would notice wearing it out though.
Overall, I think this BB cream isn't too shabby at all. I'll see how it holds up in the next few days of trying it!
Products used in FOTD:
Eyes:
UDPP
Urban Decay Naked 2 palette - YDK, Verve, Busted, Blackout
Mary Kay Lash Love Mascara
ELF Liquid Liner in Black
Anastasia Brow kit + pencil
Face:
Ren BB Cream in Light/Medium
Too Faced Chocolate Soleil
Tarte Blusher in Glisten
Mac Mineralized Skin Finish in Soft and Gentle
Mac Blotting Powder
Lips:
Shiro Why Not Zoidberg?
As always, I'd love to hear your thoughts!
Thursday, July 18, 2013
Nails: Zoya Kimber

It's been awhile since I did a nails post. I just haven't been doing anything too interesting with them lately. I did want to share this Zoya polish in Kimber though. It's absolutely gorgeous. It's a hot pink that has a nice shine to it.
Application: I found that this polish went on VERY easily. I'm not the most graceful person when it comes to nails, but this polish really made it super simple. The color was not streaky at all. I used just one layer of this polish to get the above look.
Color: I love the way this polish catches the light. I have found myself staring at my nails a lot while wearing this color. It's a really nice pink for summer.
Finish: Shine/sparkle. I would say that Kimber has shine with tiny sparkles in it. It's not like an overwhelming glitter bomb, but it's lovely in the sunlight.
Dry time: Kimber dried pretty quickly for me when I was using Out the Door topcoat. I didn't have any problems with drying.
Thursday, July 11, 2013
Tutorial: How I do my brows

Hey everyone! Today I have a tutorial on how I do my brows. I will be using my Anastasia of Beverly Hills brow kit, my Brow Wiz, and my highlighter pencil. You can use any brow powder, pencil, and highlighter. These are just my favorites.

Start out with just your bare brow. Here's mine in their naked form. Excuse the undereye bags. Sleep has been scarce lately. Yay for sparse areas!

The first thing I do is stick my finger into the wax to put into my brow. It's important to really work the wax into your brows. I like to push my brow hairs up and out towards my temples. You can use a spoolie to help you blend the wax if you really need to. I usually just use my finger.

The next step is to use an angled brush and your brow powder. Get some on the brush and get ready to mark the starting point of your brows.

When I am marking the start of my brows, I line the angled brush up with the center of my nostril. Some people do it from the edge of their nostril on the outside of the nose. It's all personal preference. I had a makeup artist at Sephora tell me to go from the center, so that's what I do. Using the brush, make a little mark to show the start of the brow.

The next step is to mark the arch. My brows are naturally arched here, so I just go through the middle of my pupil to mark the spot.

When you're done, your marks should somewhat resemble this shape above.

I then reach for my high arch stencil from the kit. I would select whatever stencil your brow shape tends to lean towards. You can also use the stencils to help you shape your brows.

When I'm using the stencil, I line up the dotted line with the mark I placed in my arch area. Then taking my angled brush and brow powder, I begin to fill in the lines within the stencil. Take your time with this step. You want your brows to be mostly filled in before we move to the next step.

After I've filled in the brows with the powder and stencil, it resembles the photo above. I don't worry too much about my original mark still showing at this stage. It will be cleaned up later.

The next product I use is my Anastasia Brow Whiz pencil.

One end is a spoolie.

The other end is a retractable pencil.

Now, gently taking the pencil, I define the brow shape by filling in any sparse areas. I also define the front of my brows a little bit more.

My brows look like this after using the pencil.

I think take the spoolie and blend everything together in my brows. I also make sure any hairs are staying in place.

I think it's important to blend the front of my brows to soften the look a little bit.

I like to apply this brow highlighter pencil to make my arch stand out more.

Just run the pencil under your brows.

Here's the shape that I create with the highlighter. It really helps brighten up under the brow. It makes everything look more polished.

I blend it out with my finger.

After all those steps, this is the final result!
Subscribe to:
Comments (Atom)